In this step we will tweak the height map a bit to make it look more realistic. First of all we will add a water layer. We will also post process the height map so that areas close to water are made more flat (like beaches or riversides) and mountain areas are made higher to appear more impressive in comparison to the flat areas.
| 1 | Import the standard Unity package for water, called „Water (Basic)“ (or „Water (Pro Only)“ if you own the pro version of Unity). (Assets/Import Package/Water (Basic) from the menu.)
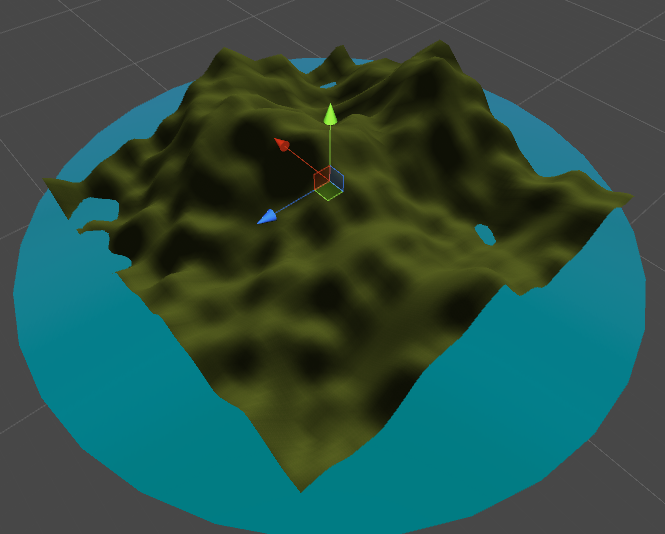
Create a water object and position it at 1000/60/1000 and scale it to 1500/1/1500. The y position of the water object depends on how much water you want in your terrain – the higher you position the water the more area will be covered by it. Since we will stretch and flatten the terrain in this step, a height of 60 will be a good start, even if only covers a little area at the moment. The scale of the water object depends on the size of your terrain; the object should at least cover your whole terrain. It should be looking somewhat like this:
|
|||||||||||||||
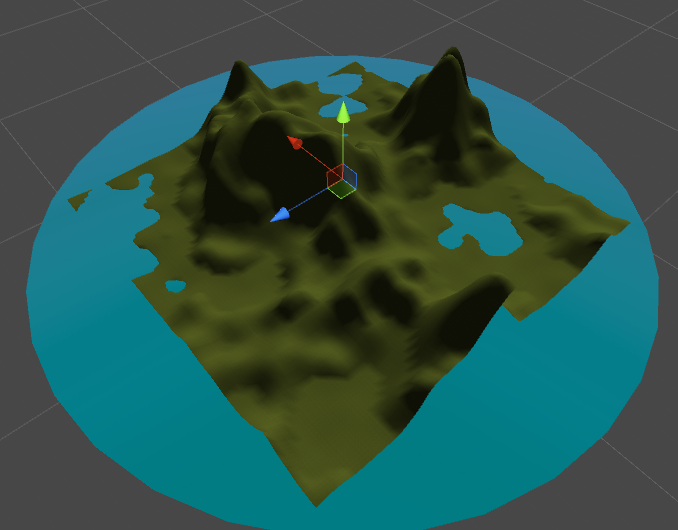
| 2 | What we want to achieve in this step can be easily seen by taking a look at the previous image and the following one that has areas close to water a lot more flattened and mountains significantly raised:
The basic idea is to slice the terrain in height layers that can be individually squeezed or stretched. In the image above for example every height value between 0.2 and 0.4 is squeezed to a total height of 0.02. That means every height in that range is divided by 10 (0.02 instead of originally 0.2) what makes it a lot flatter than before. For the mountains every height value between 0.6 and 1.0 is doubled, so it’s raised quite a bit. To be able to easily play around with this post processing step, we want the values to be configurable again. So we need an object to hold the values that define the layers. So create a new class and name it LayerDefinition. Make it serializable by adding the Serializable attribute before the class definition. This will enable the class to be used in the inspector. Define two public float fields in that class named InputRange and OutputRange: using System;
[Serializable]
public class LayerDefinition
{
public float InputRange;
public float OutputRange;
}
InputRange will be the height of the layer when reading the height value, OutputRange will be the new height of that layer when writing the height value back. So for the example above we would define 0.2 as the InputRange for the grass layer and 0.02 as the OutputRange of that layer. (Which means dividing each height value in that range by 10.) |
|||||||||||||||
| 3 | Define a public array of LayerDefinition objects in the TerrainGenerator class:
public class TerrainGenerator : MonoBehaviour
{
    public LayerDefinition[] LayerDefinitions;
    public float Level1Div = 1, Level2Div = 4;
    public float Level1Step = 200, Level2Step = 50;

    // ...
}
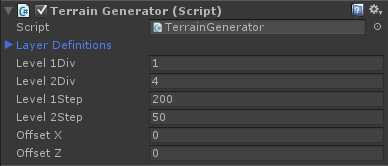
After this new array has been added you will see a new entry in the inspector of the TerrainGenerator script. It is the array that you have added and you can edit it in the inspector now:
Add 4 new values to the array and set the values of the array items to the following values:
|
|||||||||||||||
| 4 | Define a new function in the TerrainGenerator class and name it PostProcessTerrain. Call that function in Start() right after the terrain generation:
using System.Collections;
using System.Collections.Generic;
using UnityEngine;

public class TerrainGenerator : MonoBehaviour
{
    // ...

    private void PostProcessTerrain()
    {
        // lower border of current input layer
        float currInputMin = 0;
        // upper border of current input layer
        float currInputMax;
        // lower border of current output layer
        float currOutputMin = 0;
        // upper border of current output layer
        float currOutputMax;

        // make sure that heights are between 0 and 1
        NormalizeHeightMap();

        // for each layer definition
        foreach (LayerDefinition layerDef in LayerDefinitions)
        {
            // calculate upper border for current input layer
            currInputMax = currInputMin + layerDef.InputRange;
            // calculate upper border for current output layer
            currOutputMax = currOutputMin + layerDef.OutputRange;
            // calculate the value by which we have to stretch the height
            float mult = (currOutputMax - currOutputMin) / (currInputMax - currInputMin);

            // go through the whole terrain
            for (int z = 0; z < _terrainData.heightmapHeight; ++z)
            {
                for (int x = 0; x < _terrainData.heightmapWidth; ++x)
                {
                    // get the original height
                    float height = _heights[x, z];
                    // is it in the range of the current layer?
                    if (height >= currInputMin && height < currInputMax)
                    {
                        // make the height relative to the current input layer
                        height -= currInputMin;
                        // stretch/squeeze it to output layer
                        height = height * mult;
                        // make the height absolute to output layer
                        height += currOutputMin;
                    }
                    // write the height back
                    _heights[x, z] = height;
                }
            }

            // move current input lower border to next layer
            currInputMin += layerDef.InputRange;
            // move current output lower border to next layer
            currOutputMin += layerDef.OutputRange;
        }
    }

    private void Start()
    {
        _terrain = GetComponent<Terrain>();
        _terrainData = _terrain.terrainData;
        _heights = new float[_terrainData.heightmapWidth, _terrainData.heightmapHeight];
        GeneratePerlinTerrain();
        PostProcessTerrain();
        NormalizeHeightMap();
        _terrainData.SetHeights(0, 0, _heights);
    }
}
Voila! That’s it. With this simple implementation you can quite easily convert a basic terrain into something more realistic. You could add more layers or change the values of the 4 layers that we have defined – it’s up to you. |